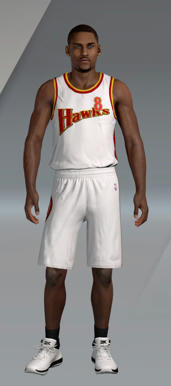
GIMP in Action! (Step by Step example) This is a link to download the jersey used in the following tutorial
https://mega.nz/file/xlk00A6b#b0v9VxSfG ... jBW4FP-5AoSo for this example, I have my template open, and I used the open archive in 7zip to open the shorts_color file in gimp. (make sure not to close the 7zip window)

Right now I have a random Nuggets shorts file open. With it theres all these mini map layers. You can completely ignore those. However, that main_surface layer is really important, and in this example, I'll show you why


So right now I have my Nuggets shorts, and the template. (ignore my selection on the nuggets screenshots, I just forgot to deselect before taking them)
Lets say I wanted to change the waistband in the Nuggets jersey from yellow to blue
Heres how I would do it
I'd go to the template, and left click and hold the "Left leg waistband color" and drag it all the way up to my preview of the Nuggets shorts
Wait a couple seconds while holding down the left click, then when gimp switches the window from the template to the shorts, drag and drop it in the middle of the Nuggets short preview
By doing it correctly, you should get something like this:

Off to the right, select the main surface

Then, use the color picker, select the shade of blue
Then switch back to that new layer from the template

Next use the select tool, select hold shift and select both black parts that were just added
Then use the paint bucket tool and change the black to blue
The end product should look something like this

However, we aren't quite done yet. Remember earlier I said that main surface part was very important? This is where that comes into play

Right now that new blue layer I added is the first layer, which is not good. Gimp only allows you to export that first layer, so if I saved it now, it won't work in game since the shorts layer wont be saved.
So what you have to do is merge that top layer down

This can be done by pressing the button with an arrow pointing down and three little rectangles to the left of the arrow
By doing so, this should be your result:

Now that we are all finished up with our changes, go to file and overwrite the nuggets shorts file

By overwriting, this makes sure that the file saves as the same specific dds format that is readable for NBA 2K20.
DONT choose to overwrite if you haven't merged the layers together, as you will lose all other layers. You can overwrite if you are not done with editing your jersey, but you MUST make sure you have merged everything to one layer, (keep in mind this can always be undone at a different point, but not merging will make you lose all your progress on layers below)
Once you overwrite, you should see this at the top of your window, showing your changes have been saved

Last thing to do now is exit gimp

This window will pop up, you can just disregard any changes
Now go to your 7zip window and you should see this:

Press ok and you are one step closer to being able to use your mod in game!


